Configurations
Step 1: Enable and Set Up Embeddable Components in Advanced Billing
For Early Access, contact the Maxio Support Team for assistance.
First, identify the domain where you will host the website and generate a sign-in key for authenticated access to the host server.
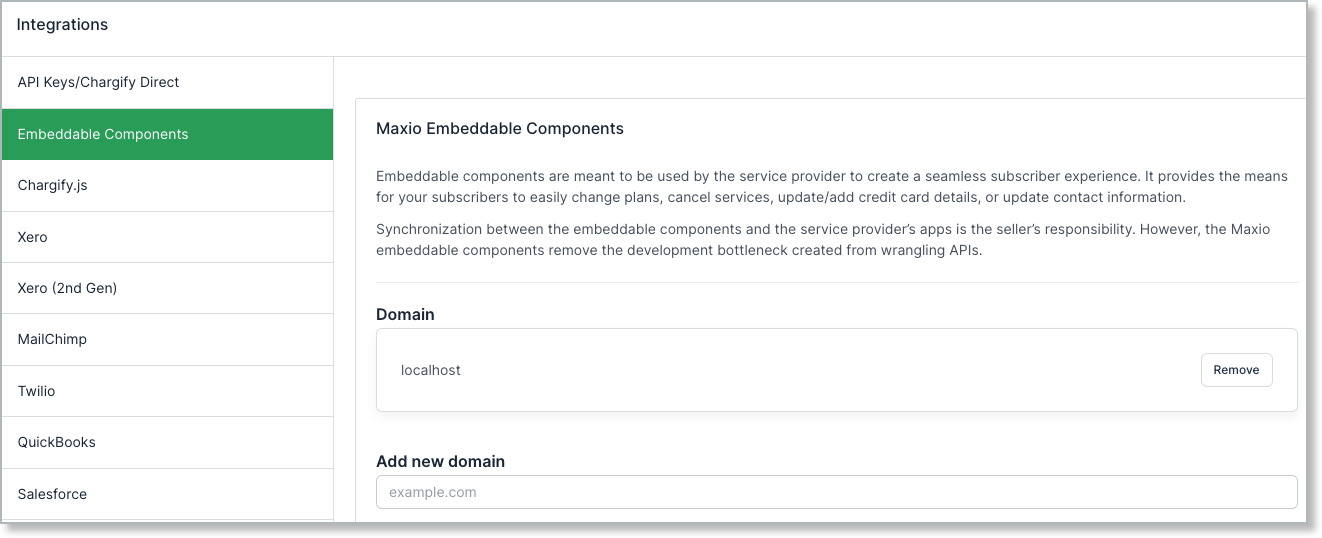
The localhost domain will need to be added to develop the integration on a local machine. Once development is done, remove the localhost domain.
-
From Advanced Billing, go to Config > Integrations > Embeddable Components.
-
Enter a Domain and click Enable Maxio Components.
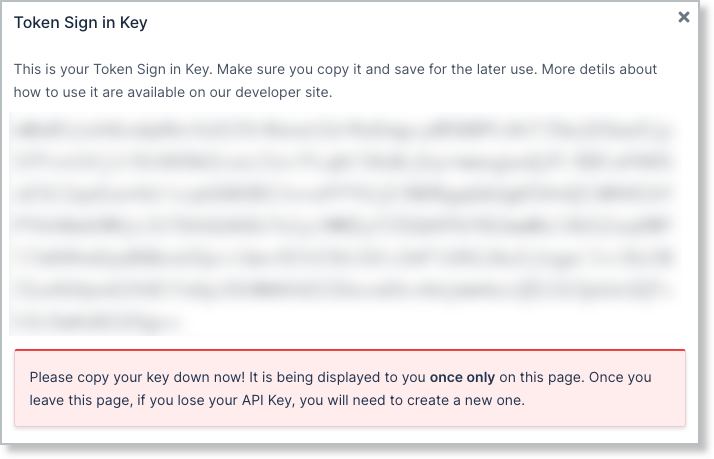
This automatically generates a Base64 encoded Token Sign in Key.
-
Copy and store this token for later access.
Should you lose this key, you will need to generate a new one.
-
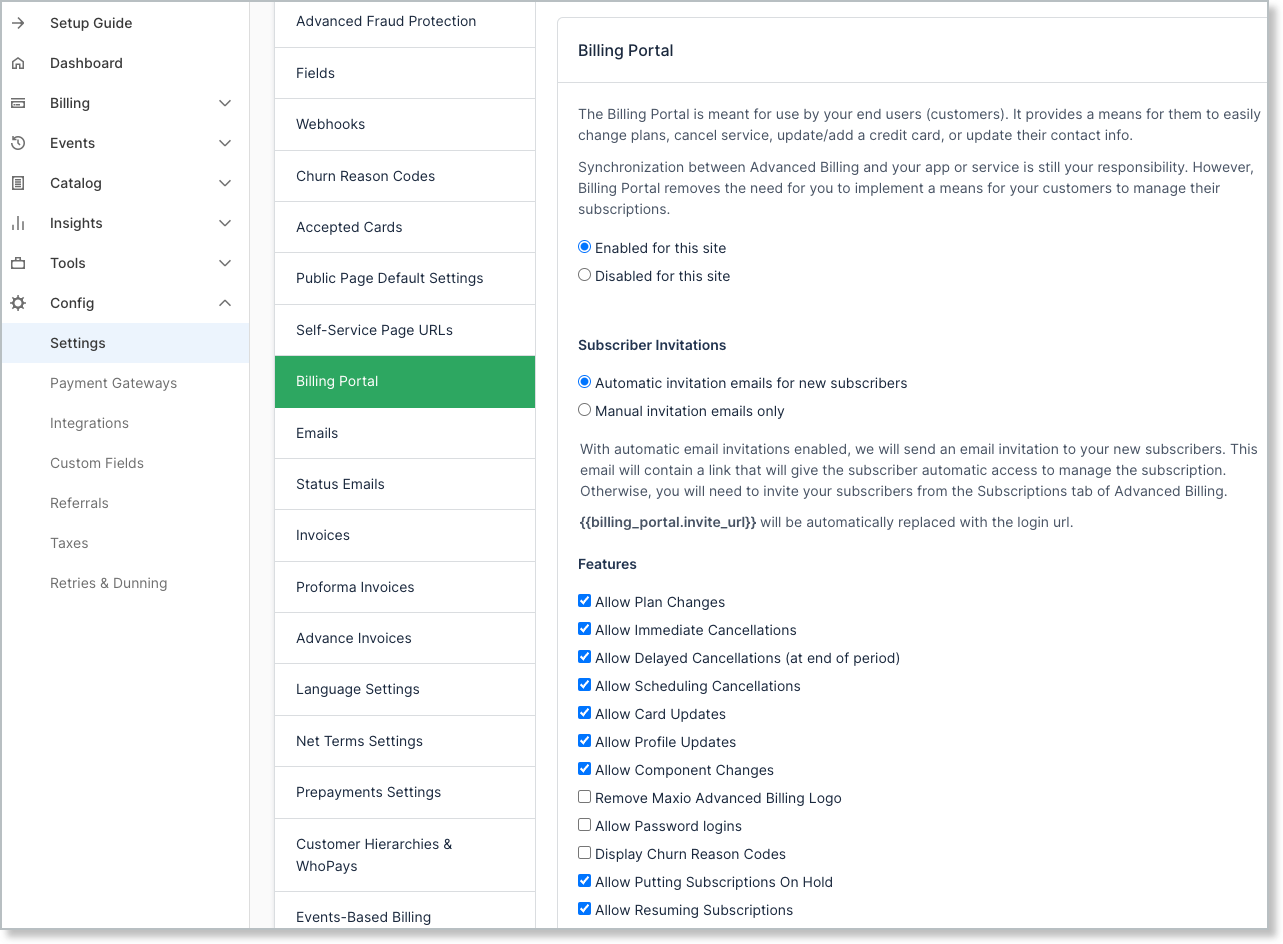
Go to Config > Settings > Billing Portal and click Enabled for this site.
-
Select which Features will be available to your Customers.
Some unchecked Advanced Billing configurations are not needed for Embeddable Components. For example, Remove Maxio Advanced Billing Logo does not have influence on your self-hosted application. Others, like Allow Plan Changes will have an impact on your self-hosted application. Ensure the necessary features are enabled to meet the needs of your implementation.
-
Click Save.
Step 2: Install the Components from Node Packaged Modules (NPM) Package Manager
Installing node.js also installs npm. Node.js is also required to run the vue.js or react.js examples.
-
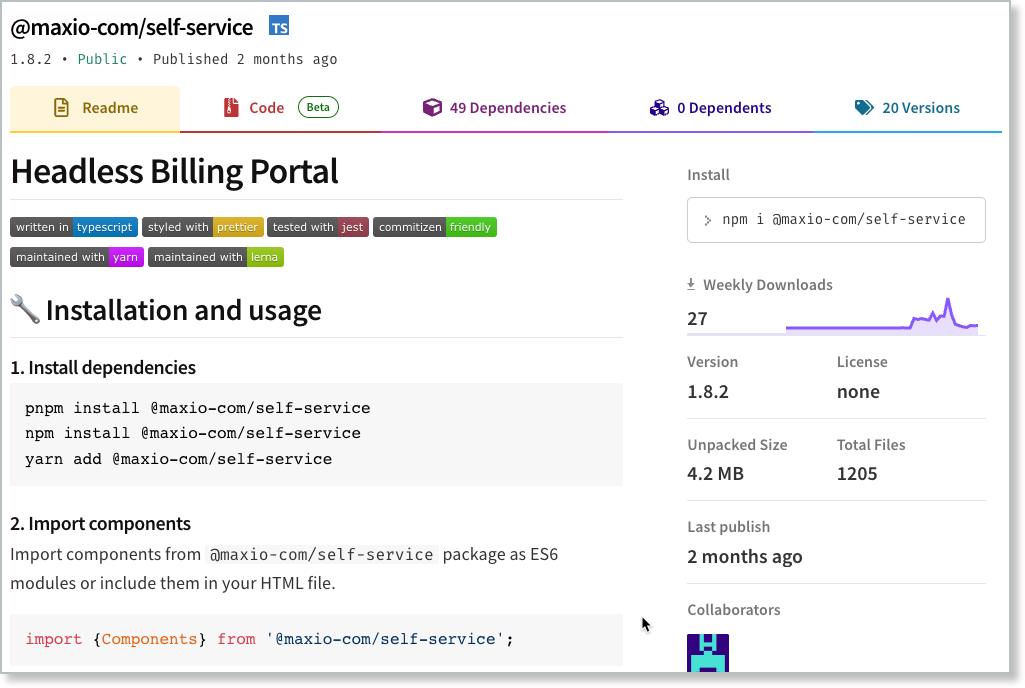
Access the self-service package.
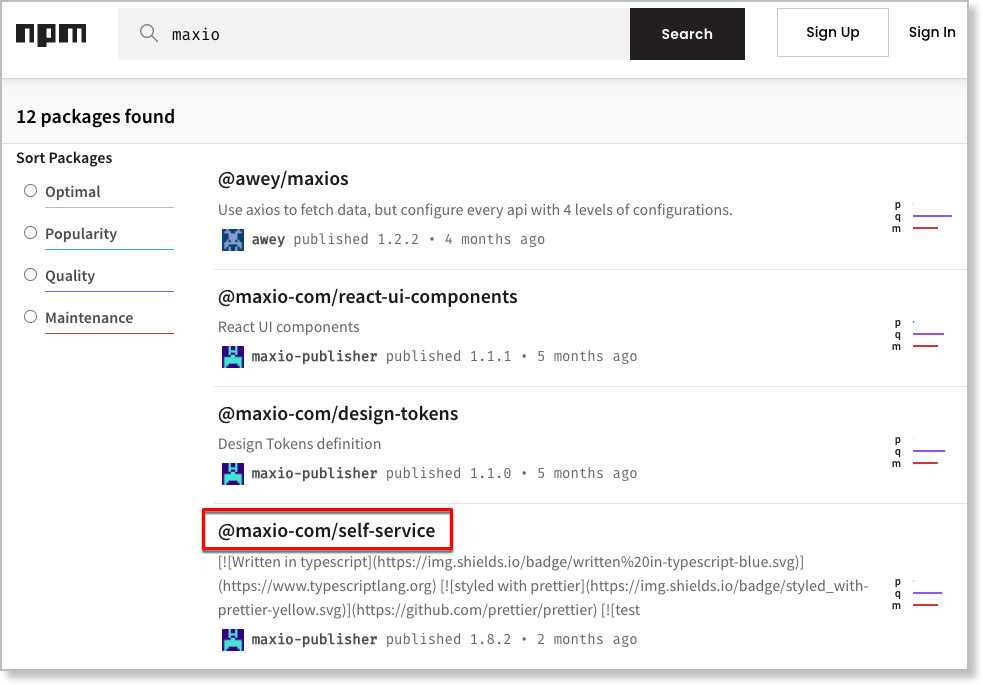
The Readme provides installation instructions, points to vue.js and react.js examples, and goes through repository setup and use.
-
Create a project directory locally on your machine.
-
Open a command window/terminal and navigate to the local project directory you just created.
-
To download and install the dependencies, run the given npm CLI command:
npm install @maxio-com/self-service
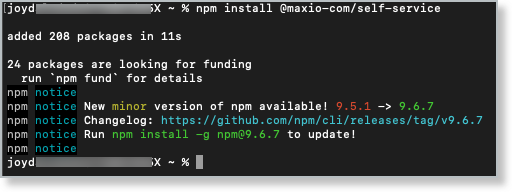
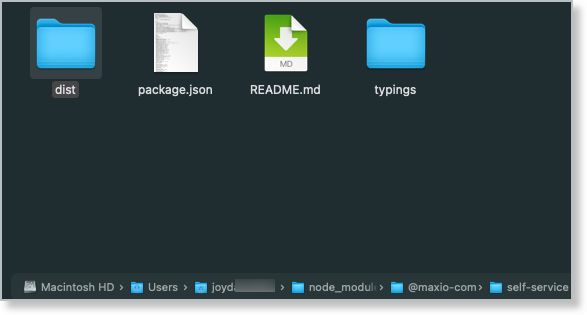
A successful installation creates the node_modules directory in your local project folder. In this directory, you will find the
@maxio-com\self-servicedirectory.
Step 3: Use the Examples
To start using these components right away, use the out-of-the-box Vue or React examples provided.
The following set-up example uses vue.js on localhost.
Setting up the Vue.js Self-Service Example
-
From the npmjs.com > Headless Billing Portal Readme page > Installation and usage, go to #4 Examples and click the vue-self-service-example link.
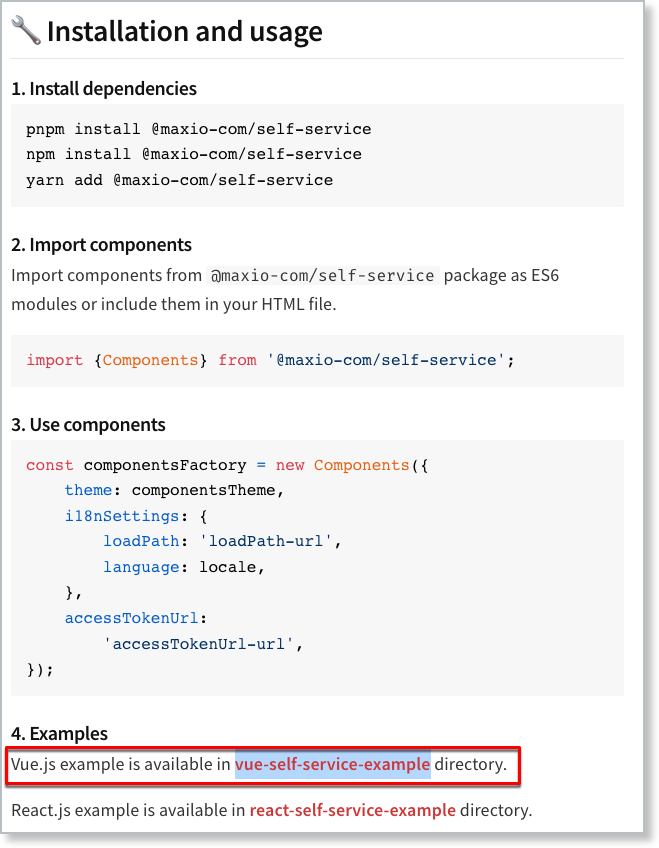
This takes you to the maxio-com vue.js example GitHub repository.
-
Clone the repository to your local environment:
git clone https://github.com/maxio-com/vue-self-service-example -
Open the cloned repository and install the dependencies:
pnpm install
or
npm install -
Run the development server (respectively):
pnpm run dev
or
npm run dev
Viewing the Example Application
To view the Embeddable Components from an example application, open http://localhost:3000/.
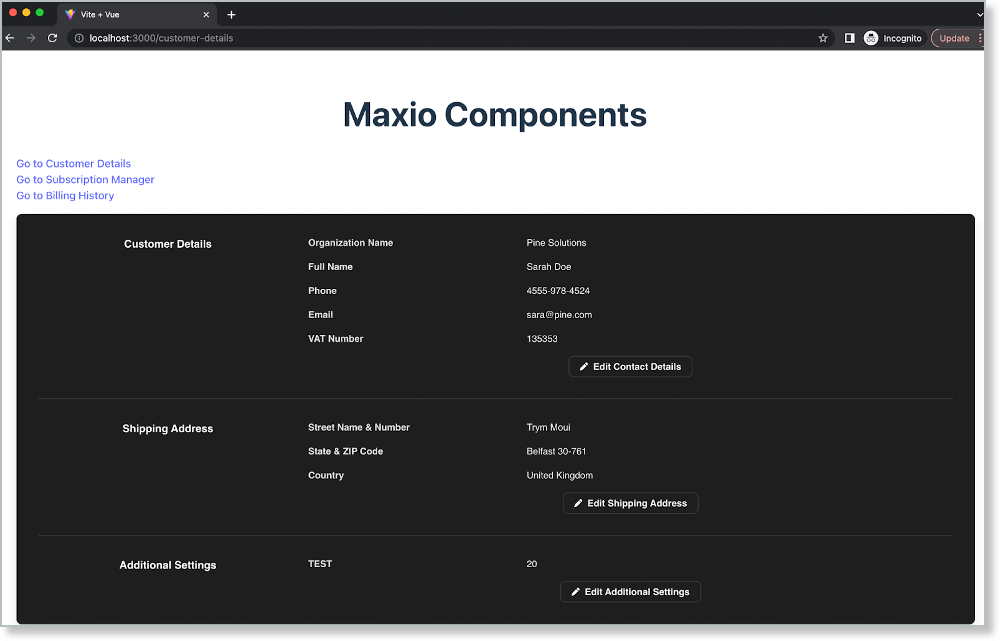
Configuring the Example
-
From your editor, go to src > components, and open BillingHistory.vue.
-
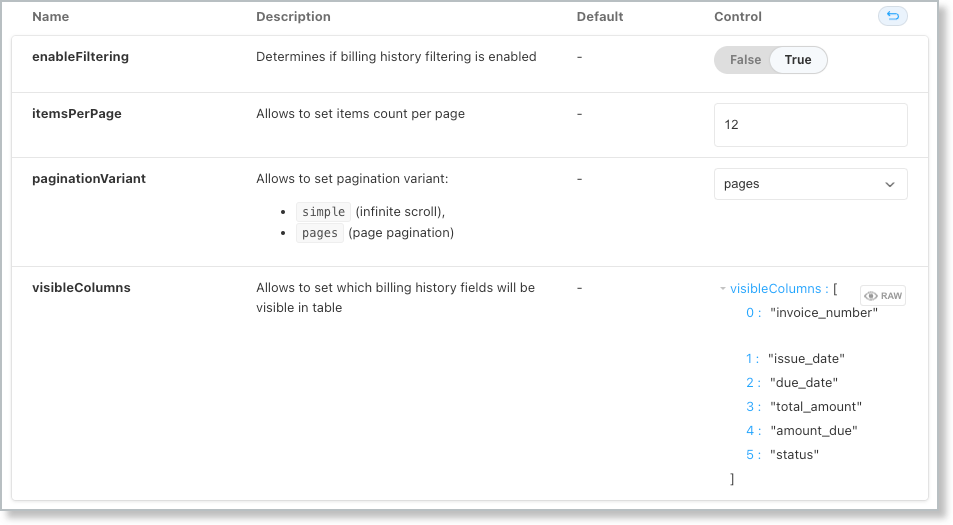
Edit the following options:
Option Description Example itemsPerPage Sets the number of items to list per page. itemsPerPage: 10, paginationVariant Sets the pagination type:
- simple (infinite scroll)
- pages (page pagination)paginationVariant: 'simple', enableFiltering Enable (true)/disable (false) billing history filtering. enableFiltering: true, visibleColumns Set the array for the billing history fields (columns) to show on the table. visibleColumns: [
"invoice_number",
"issue_date",
"due_date",
"total_amount",
"amount_due",
"status"
]Example of Billing History Component options:
-
Go back to the example application in your browser, open the Billing History page, http://localhost:3000/billing-history, and note the changes you made.
-
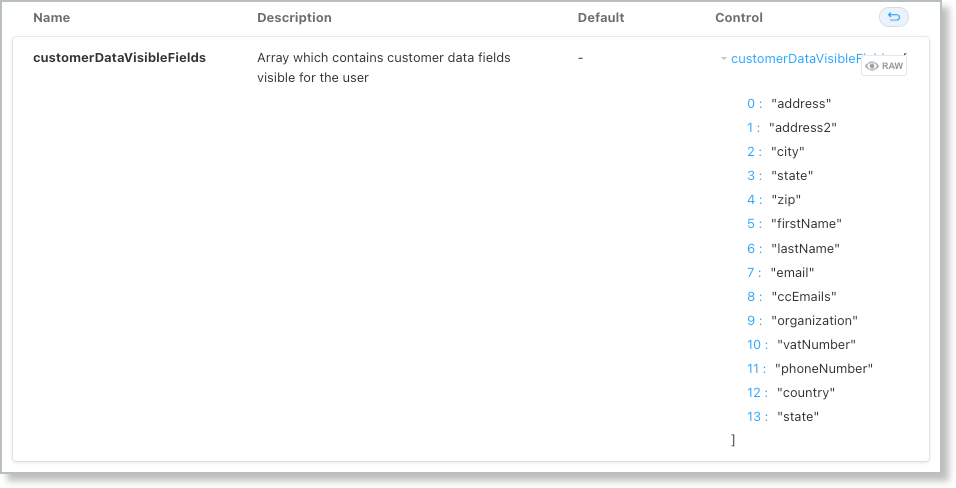
Next, open CustomerDetails.vue and edit the following options:
Option Description Example customerDataVisibleFields Set the array that contains the customer data fields visible to the user. customerDataVisibleFields: [
"address",
"address2",
"city",
"state",
"zip",
"firstName",
"lastName",
"email",
"ccEmails",
"organization",
"vatNumber",
"phoneNumber",
"country"
]Example of Customer Details Component options:
-
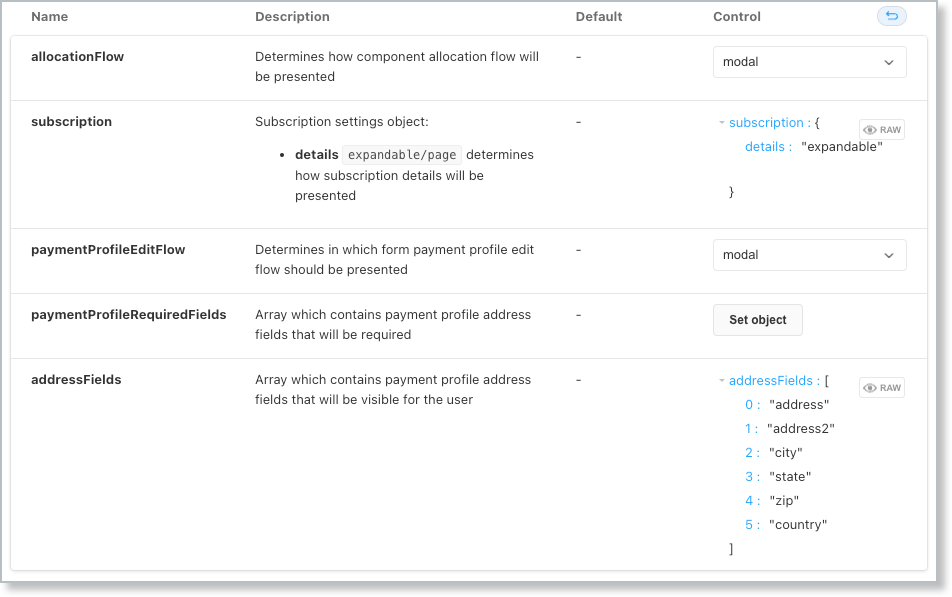
Finally, open SubscriptionManager.vue and edit the following options:
Option Description Example allocationFlow Set how component allocation flow is presented:
- modal
- pagesubscription Subscription settings object:
- details
Set how subscription details are presented.paymentProfileEditFlow Set which form payment profile edit flow is presented.
- modal
- pagepaymentProfileRequiredFields Set the array that contains the required payment profile address fields. addressFields Set the array that contains the payment profile address fields visible to the user. addressFields: [
"address",
"address2",
"city",
"state",
"zip",
"country"
]Example of Subscription Manager Component options:
Step 4: Optional Configurations
Use as a Standalone Library from CDN
To use Embeddable Components as a standalone library from a Content Delivery Network (CDN) do the following.
-
Add this script that points to the library in CDN to your page:
<script src="https://cdn.jsdelivr.net/npm/@maxio-com/self-service@1.9.0/dist/maxio-components.umd.min.js"></script> -
Initialize Components.
const factory = new window.Maxio.Components(options); // Render Billing History to the document.body element let element = factory.create("billing-history"); element.render(document.body); -
Your local environment should match the domain you configured (add localhost if you want to run it locally).
Example:
<html>
  <head>
    <meta charset="utf-8" />
    <script src="https://cdn.jsdelivr.net/npm/@maxio-com/self-service@1.9.0/dist/maxio-components.umd.min.js"></script>
  </head>
  <body>
    <script>
      const factory = new window.Maxio.Components({
        i18nSettings: {
          loadPath: "<path to localization file>",
          language: "en",
        },
        accessTokenUrl: "<path to authorization service>",
      });

      let element = factory.create("billing-history");

      element.render(document.body);
    </script>
  </body>
</html>
Additional Advanced Billing Configurations
Custom Fields (Metafields)
You can set the level of access for each custom field (or metafield) to be viewable and editable for customers using Embeddable Components. These settings apply to both subscription- and customer-level custom fields. The scopes are named public_show and public_edit, respectively. Setting 'public_show' to '1' makes the custom field visible in the Embeddable Components application, while setting 'public_edit' to '1' makes it editable.
Editing and viewing these metafields settings are currently only supported using the API.
Individual Component Configuration
Apart from the global components update setting, each individual component has an additional property controlling whether it can be updated using a billing portal. This property option is also respected by Embeddable Components.
Do the following to enable the Billing Portal for a component.
-
From Advanced Billing, go to Catalog > Products.
-
Select the Products family to which the component belongs.
-
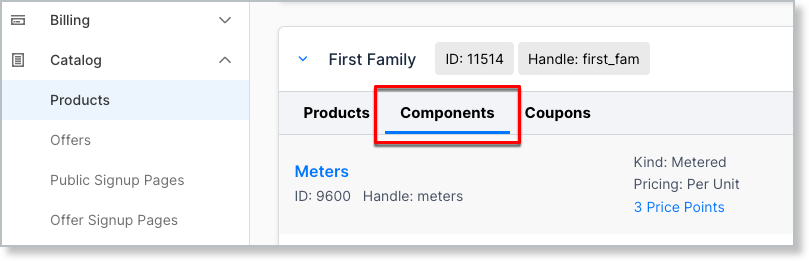
Click the Components tab.
-
Choose a component.
-
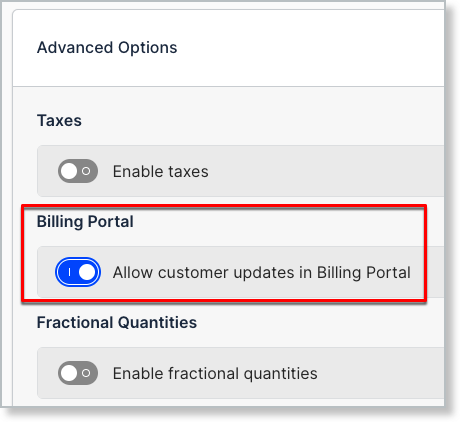
Scroll to the bottom of the component page, and for Advanced Options click Edit.
-
Enable the Billing Portal option.